Some buy while others build – that’s what we’ve discovered when it comes to record player stands. With this list of DIY turntable stands, you’ll discover a bunch of bloggers who decided to get their hands dirty.
It’s a bit more interior decorating orientated, but if you’ve ever considered creating your own vinyl setup, you should find some inspiration here.
Here are 10 of our favorite projects from around the internet.
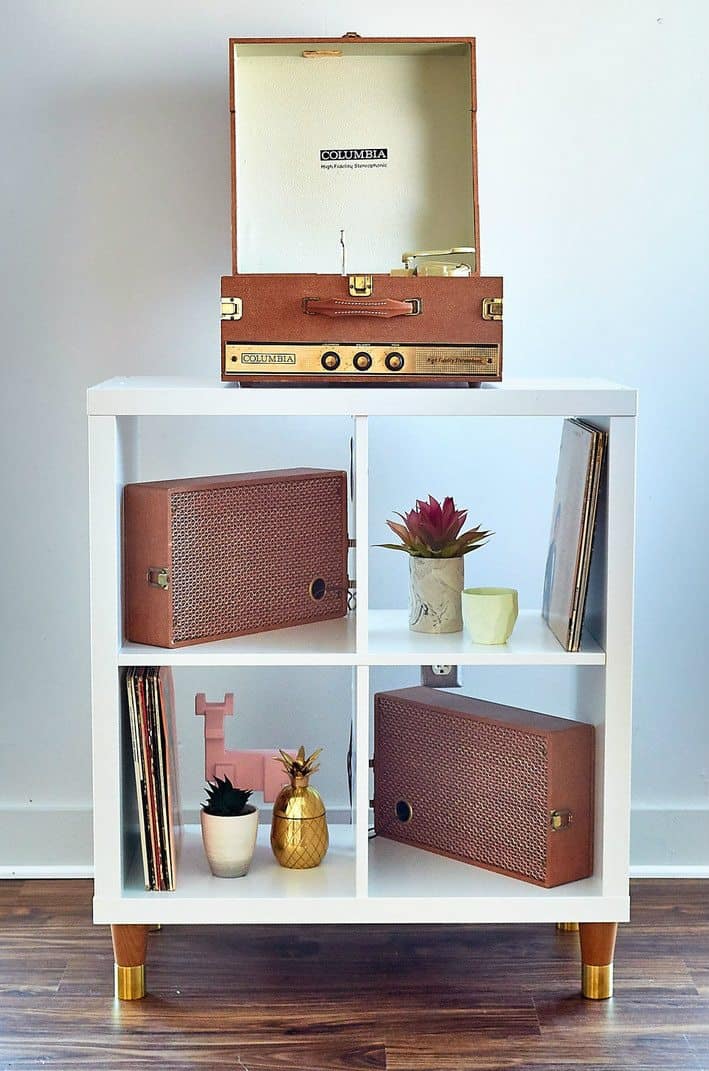
DIY Vinyl Record Shelf by The Surznick Common Room
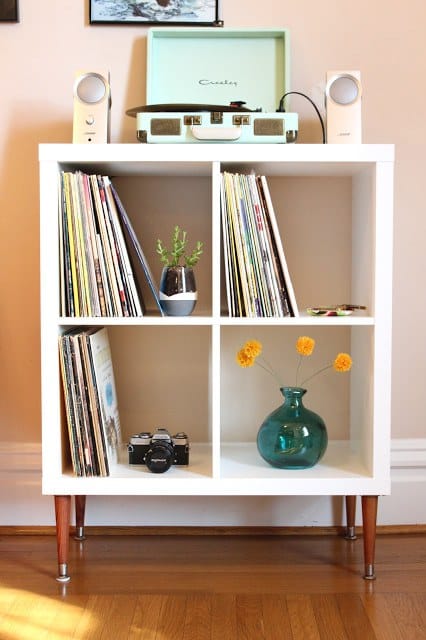
This vinyl record shelf clean, sophisticated and well suited for storing records. It leaves plenty of room for other small household items such as flower pots, gadgets to be stored within or on top.
The original piece of furniture used for the project was part of the KALLAX Shelf Unit from IKEA. Materials consist of particle board, fiberboard, ABS plastic and was painted with white acrylic paint.
Surznick’s Common Room cleverly modified it to include 5.5-inch round taper legs and turned it into the ideal, simple and functional record storage piece.
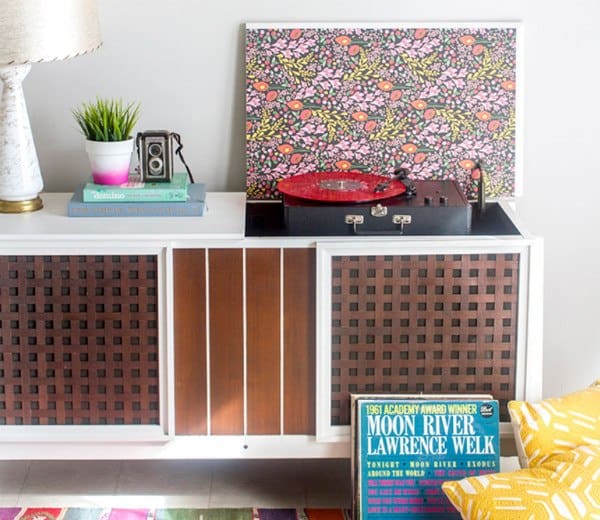
DIY Record Player Stand from Marianela from Love Vividly
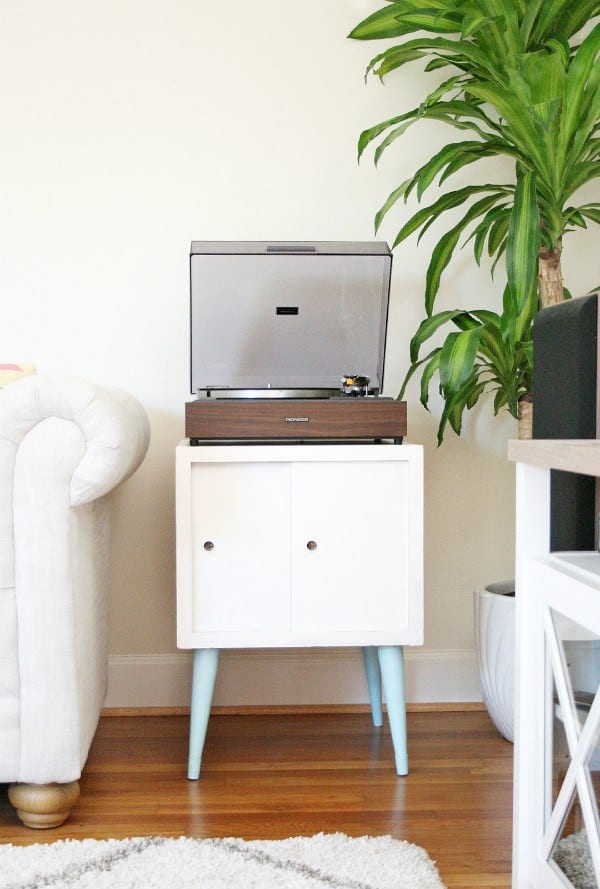
This stand has been slightly modified by Marianela from Love Vividly, and the result is super impressive! The original design of the player is a vintage small furniture piece that uses small sliding doors to secure the storage area.
The modifications made to this piece only consisted of painting the entire body white and the legs with an aqua color.
It’s amazing what a little paint can do to an old piece of furniture.
The makeover allows the stand to match well with the interior color of most modern home designs and is also great for a small size record collection.
This can be especially great if you don’t have a lot of room for furniture and live in an apartment.
Learn more about Marianela’s project here
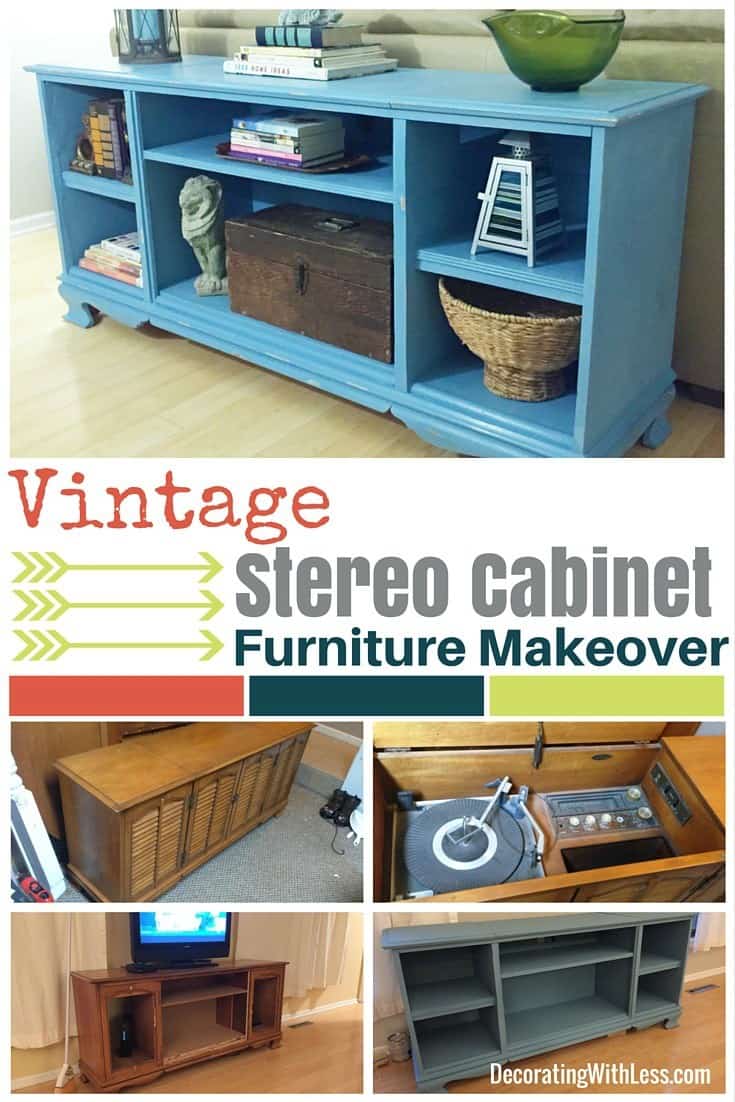
Old Stereo Console project by Robert from Old Crazy House
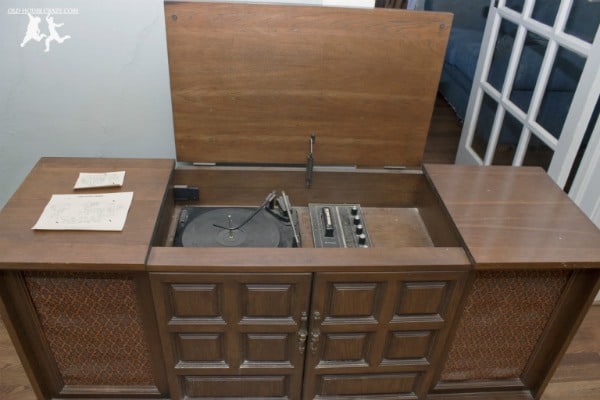
The modification of this project initially started with a vintage stereo console from Sears. If you have an antique cabinet like this, you might be wondering what it’s worth.
The original design included spacing for a radio tuner, a turntable, and speakers which were hidden behind an orange-brown cloth. Robert and some of his relatives are currently planning on doing some modifications to the console.
They plan to sand and refinish the wood and replace the speakers. Most of the old audio equipment is also expected to be taken out and replaced with updated material that is capable of playing digital media.
The new design will even have cables that connect to it and run through the walls to the exterior speakers in the backyard and on the porch.
Be sure to keep an eye on this unfinished project by visiting Robert’s site in the link below.
Follow the progress of the project here
DIY console by Alicia Lacy from Curbly
This furniture piece was inspired by a project from Surznick Common Room (first item on the list). Just like the Surznick Common Room piece, the original model was a KALLAX shelf unit from IKEA.
However, in this version, Alicia has made use of a set of 4 Estelle low legs to alleviate the item from the ground. The legs were attached to the shelf using mounts and a drill in a process that took roughly 15 minutes.
Alicia also makes use of the removable speakers that came with her record player and stores them inside two of the shelves. The remaining shelves were filled with records while adding a few extras for decorative purposes.
DIY Retro Cabinet by Carrie and John from Dream Green DIY
This project began with a vintage stripped down cabinet with a wooden lattice. The inner workings and speakers of the original cabinet had been yanked out thereby leaving it somewhat empty and un-functional.
The entire cabinet was then taken apart and thoroughly cleaned. The most critical areas of the unit were waxed in preparation for painting. The legs and the front of the cabinet were then painted using Glidden’s High Endurance Grab-N-Go paint in white color.
Four additional fast coats of white paint were brushed on the front of the cabinet to create contrast and dimension. A wallpaper panel with graphic motifs of colorful flowers was then stuck to the back of the board.
The entire re-do gave the cabinet a contemporary edge while also making it look modern with bold color and contrast.
See the project from Dream Green DIY here.
DIY Stand Makeover by Nicki from Sweet Parrish
This project began with a vintage mid-century modern record stand that was scratched up and had a damaged back veneer. Its finish was a bit dirty but still in good shape.
First, the entire piece got cleaned thoroughly. A sander was used to remove the original finish. After completing the sanding process, the cabinet was wiped down with a tack cloth to remove all the dust that came from sanding.
A few repairs were then done and afterward, Nicki painted the primer using a toothbrush. After the paint on the primer was completely dry, wet sanding was done between each coat of primer, color, and poly.
Next came the painting process. A Miniwax stain marker was used on the splattered parts of both sides of the stand. Once the stain was completely dry, three light coats of paint were used on the poly with some wet sanding in between and after the poly dried.
The result is a piece of furniture looking completely different from the original vintage item. The modern look makes it very appealing for almost any home and probably worth a lot more than it originally cost.
Read more about Nicki’s project here
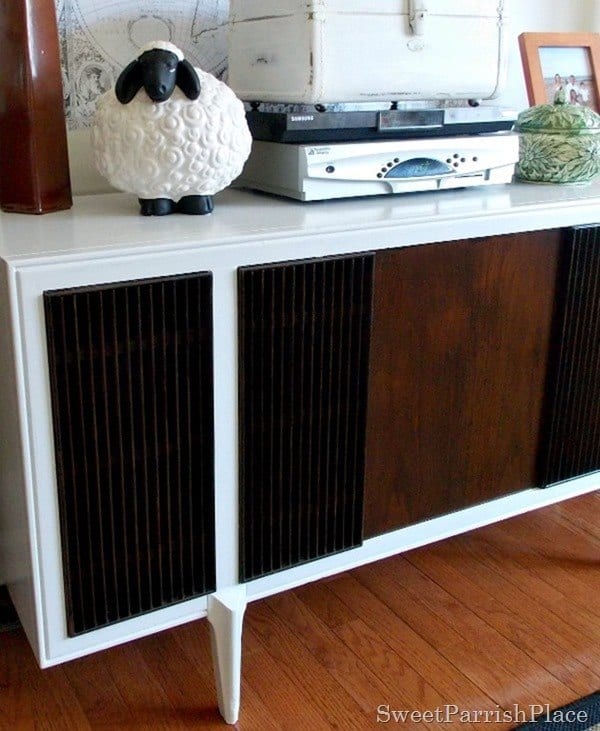
Stereo Cabinet by Matthew from Decorating With Less
Matthew began remaking this vintage cabinet by pulling out all the doors. He planned to re-use the louver panels as cabinet doors. Unfortunately, this plan did not work out accordingly and therefore; he ended up removing the panels.
The removal of the speakers ended up leaving large openings in the cabinet and to break up these areas, shelves were added.
Priming was then done first before chalk painting because MDF was used for the shelves which end up soaking a lot of paint. Next, distressing was done, and for this, high grit sandpaper was used to sand off the various section of paint.
Finally, two coats of clear wax were applied to protect the painted finish and give it a light matte shine while also enhancing its color.
Although he turned an old record stand into a nonfunctioning music furniture piece, it still looks great and can easily be used for vinyl storage.
DIY Cart by Cheri from Remixed Interiors
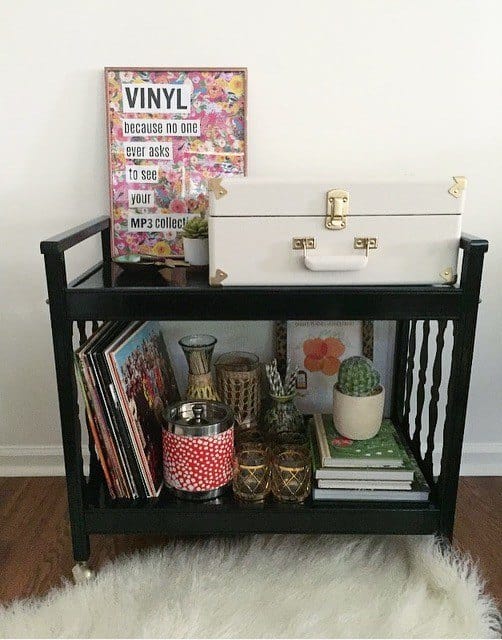
Here’s a unique project that might easily slip your mind. The project started with a vintage microwave cart. Firstly, the dirt and grime on the cart were scrubbed off entirely, and the wheels and hardware were taped off to allow the painting process to be done quickly.
Next, the surface of the cart was sanded to rough it up a bit to allow the paint to adhere. After sanding, the residue was then wiped off using a tack cloth.
Rust-Oleum’s black gloss enamel paint was then applied to the entire surface of the cart. The paint was applied to small sections at a time.
The paint was left to dry for 24 hours, and the result was a gorgeous looking cart. What an excellent out-of-the-box idea for a turntable storage solution with a very quick turnaround time.
Read more about Cheri’s project here
Vintage Furniture by Jamie from Southern Revivals

This project started with a vintage stereo cabinet that had its components removed leaving it looking like a cabinet shell, but with great potential. However, the underside of the item was almost turning to dust, and the veneer was peeling off slowly.
First, the cabinet was thoroughly cleaned using a vacuum and vinegar solution. Next, the shelf that housed the old turntable was cut out to open up that specific part of the compartment and then painted steel blue.
Next, the brass ‘Telefunken’ plate was polished off and cleaned well making it stand out. For the speaker cloth, an embroidery cloth which was sparkly was used. The top was still in good condition, so it was sanded, sealed, and stained.
The result was a gorgeous looking cabinet that could be used for storing glasses and drinks while still being able to play music via Bluetooth.
Read more about Jamie’s project here
Record Cart by Gail Wilson

This project began with a vintage record cart that was bought for only $5 at Vendor’s Village. Krud Kutter, a cleaning agent, was used to clean out all the dirt, grime, and nicotine that was on the stand as well as the metal parts.
The cabinet’s top was not in good shape. Therefore, a new top was cut out of a scrap of 1 x 12 boards. Next, Miniwax Pre-stain conditioner was used before the staining process. After the conditioner dried, Miniwax Jacobean dark stain was used on the 1 x 12 board.
The bottom wood pieces were then sanded, and the stain on them was used. Finally, after the stain dried, the wood pieces were then sealed using Wipe-on Poly.
The result was a one of a kind record table that looked new and utterly stunning.
Find out more about Gail’s project here
What are record players worth?
Record player prices differ widely as it depends on whether you are purchasing a second-hand or brand new player and the features available. Generally, prices for new record players can range anywhere from $50 – $400 and more on Amazon. Often, the more expensive the record player, the better features and quality is offered.
How do you make a record player stand?
As you can see, a record stand can come in many different shapes and sizes. In this post, I’ve shown people using carts, traditional cabinets, old stereo cabinets, end tables and more. Your options are almost limitless. If you want to make your own stand and have the tools and skills to do so, use YouTube to find a tutorial video. Here’s a tutorial I’ve found that will surely help!
How do you make a record player cabinet?
Cabinets tend to be bigger furniture pieces with many doors, enclosures, and storage space. Here’s a DIY record cabinet tutorial I found on YouTube that you’ll like:
Conclusion
There you have it! 10 different DIY project that you can draw inspiration from for your vinyl collection. Some require lots of hard work and time while others are pretty simple. Remember to check out our how to & DIY blog section for more record inspired ideas.